Vembu: Backing Up Your Hyper-V Environment
Ben Liebowitz
- 0
- 3614
I’ve blogged about Vembu and backing up your VMware Environment, but I haven’t talked about Hyper-V yet. So I spun up a Nested Hyper-V Server in my lab to see how Vembu works with backing up Hyper-V!
First, as you can see in the screenshot below, I deployed a single Windows 2019 Server and installed Hyper-V. I configured the network switch and the storage. After that, I deployed two VMs. One VM is running Windows Server 2016 and the other Windows Server 2019. The first one is running Windows 2016 mostly because I copied the wrong ISO locally and didn’t feel like waiting to copy the other one. While the first one installed Windows, I copied the 2019 ISO. 🙂

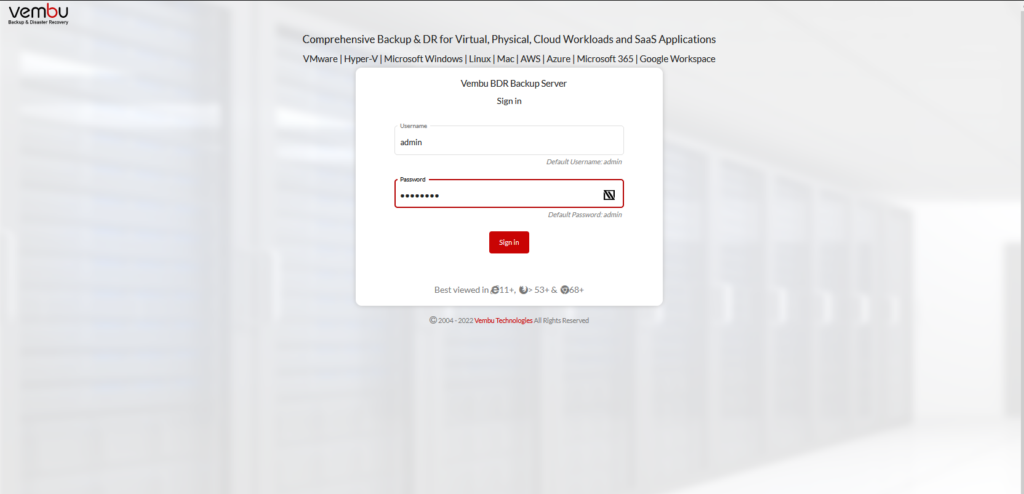
Next, lets jump into Vembu and setup the backup job! The first step, logging in to Vembu!
First, we have to add our HyperV host. Click Data-Sources – Add Microsoft Hyper-V – Hyper-V Servers (Standalone)

Next, we have to click ADD MICROSOFT HYPER-V]

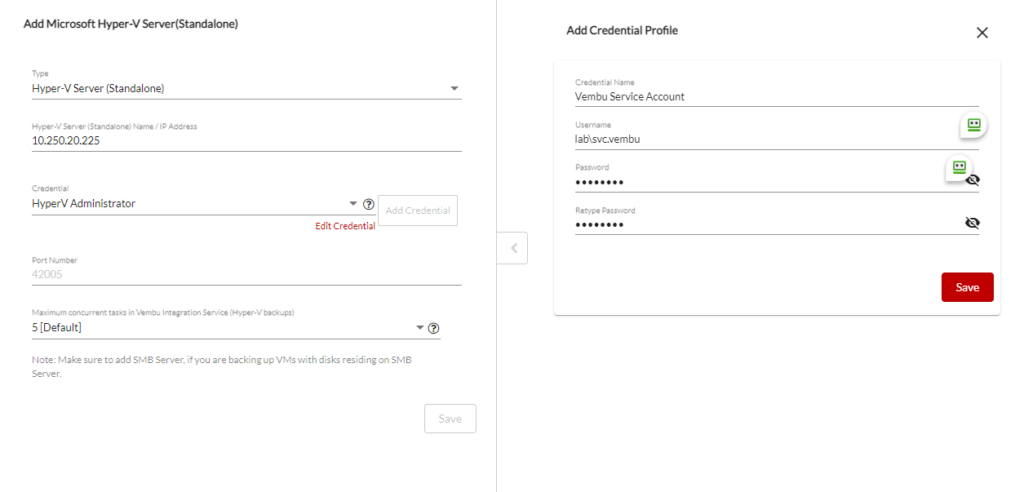
As I’m running a stand-alone Hyper-V server, I choose that type and filled in the Hyper-V Server name and assigned a credential.
*** The Credential used must be the same credentials used for the Vembu Service. ***
Vembu will install a small agent on the target Hyper-V Server.

It may take several minutes for Vembu to install the agent. Eventually, you’ll see a confirmation message.

If you refresh the page, you’ll see your server added.

Next, we click BACKUP – CONFIGURE BACKUP – MICROSOFT HYPER-V

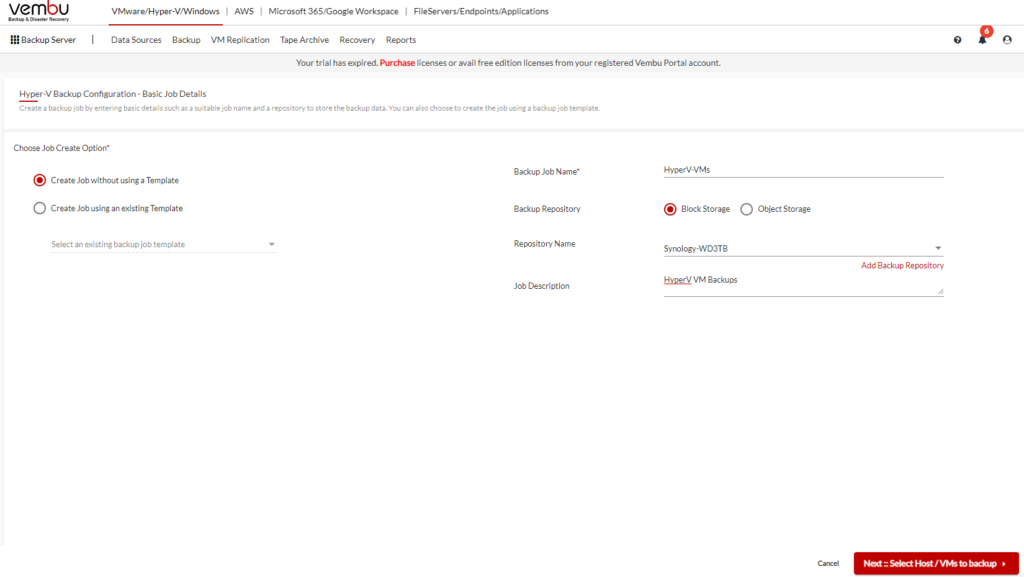
Next, we’ll give the job a name, choose the Repository and a job description. Click NEXT.
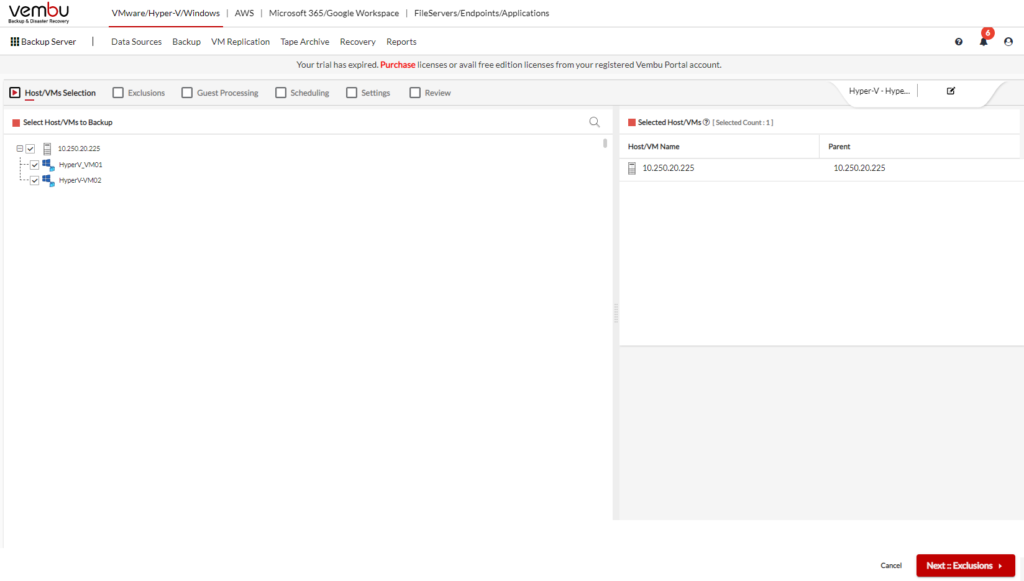
On the left, you’ll see the Hyper-V Host that we added above. If you expand, you’ll see the VMs also. Select which ones you want to backup and click NEXT.
I have no Exclusions, so I will just click NEXT. However, if you didn’t want to backup one of the VMs on your host, you can exclude it here.
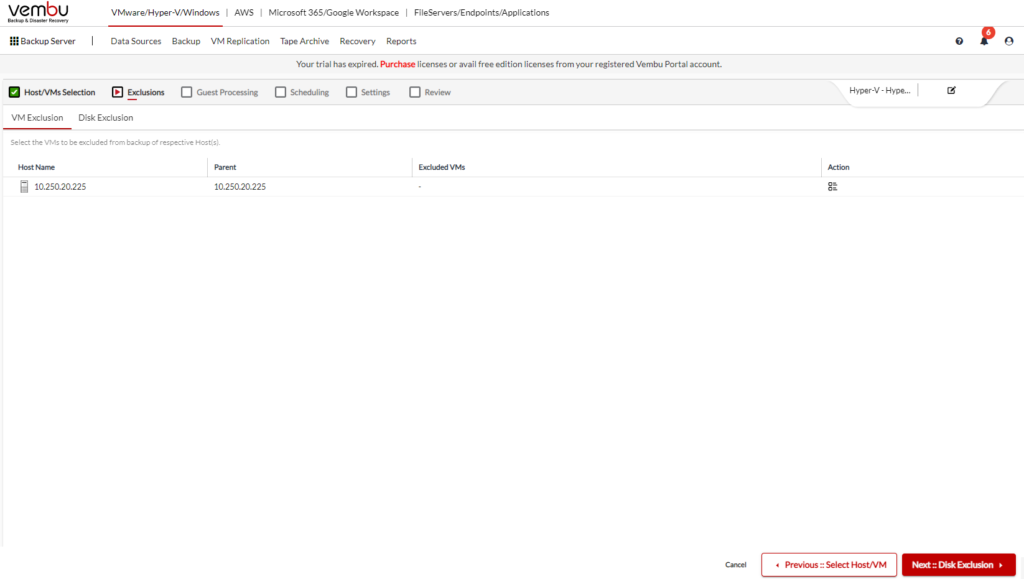
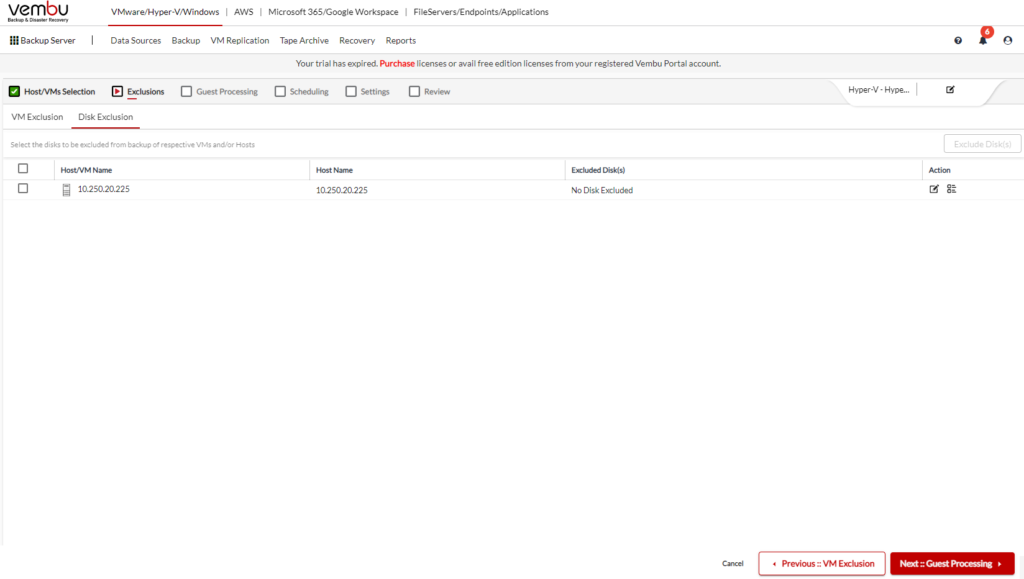
Next, you can select any Disk Exclusions. Say if you had a D drive for your system swap file and didn’t want that backed up, you can exclude it here. If not, click NEXT.
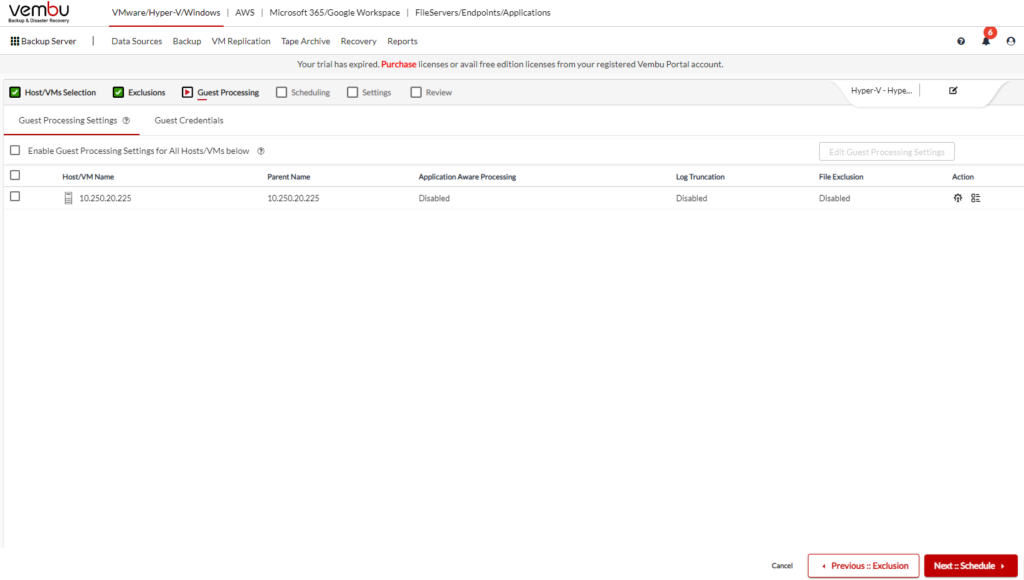
On the Guest Processing section, you can configure Application Aware Processing, Log Truncation, and File Exclusions. If not, click NEXT.
Next we’ll setup the backup schedule. I’m choosing daily backups at 6am.
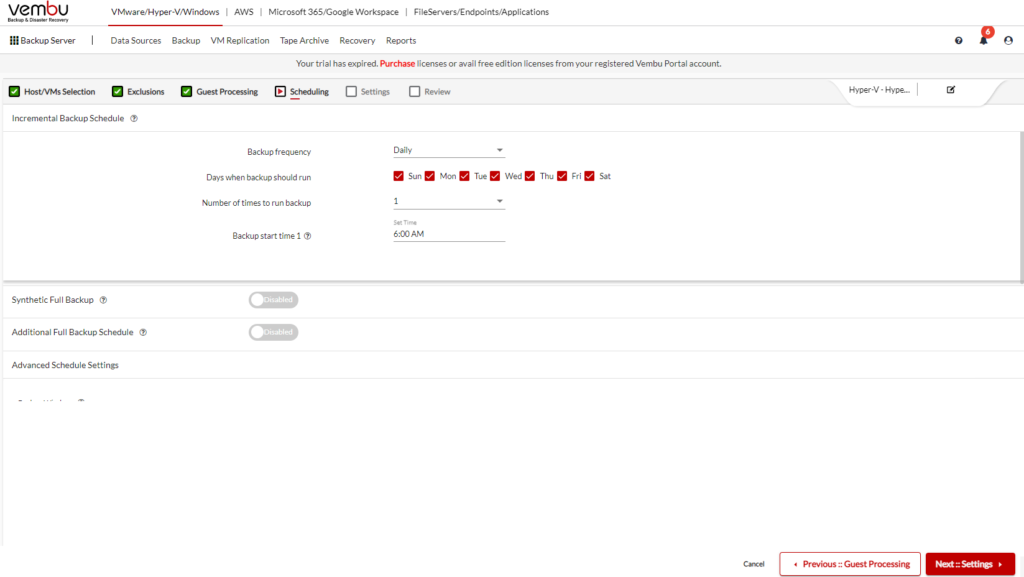
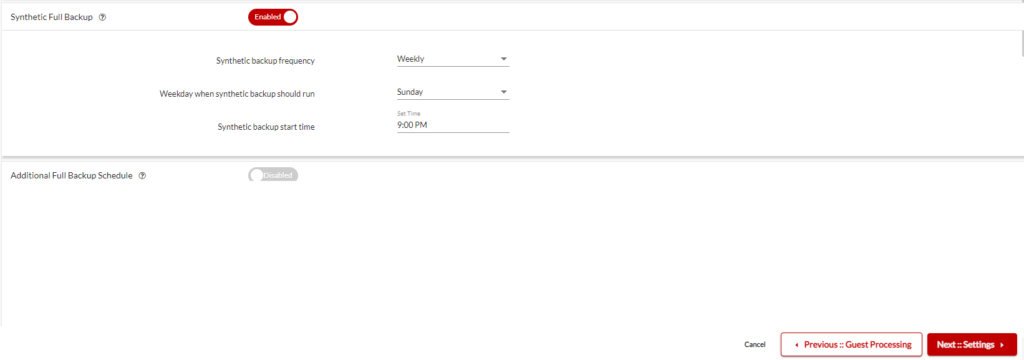
I’m also going to setup Synthetic Full backups to run on Sundays at 9pm.
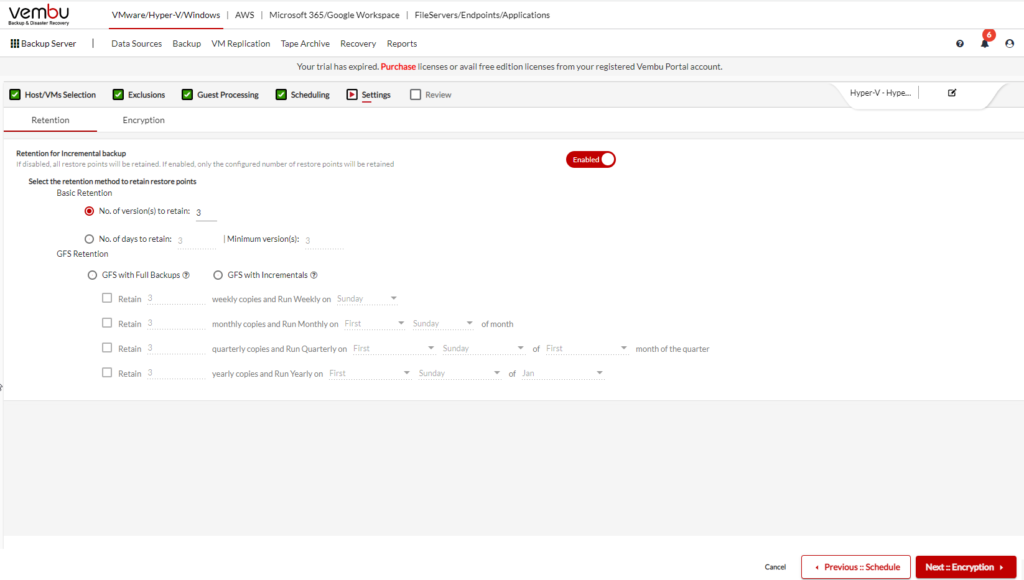
On the Settings page, I’ll enable retention for Incremental Backup and set it to retain 3 versions.
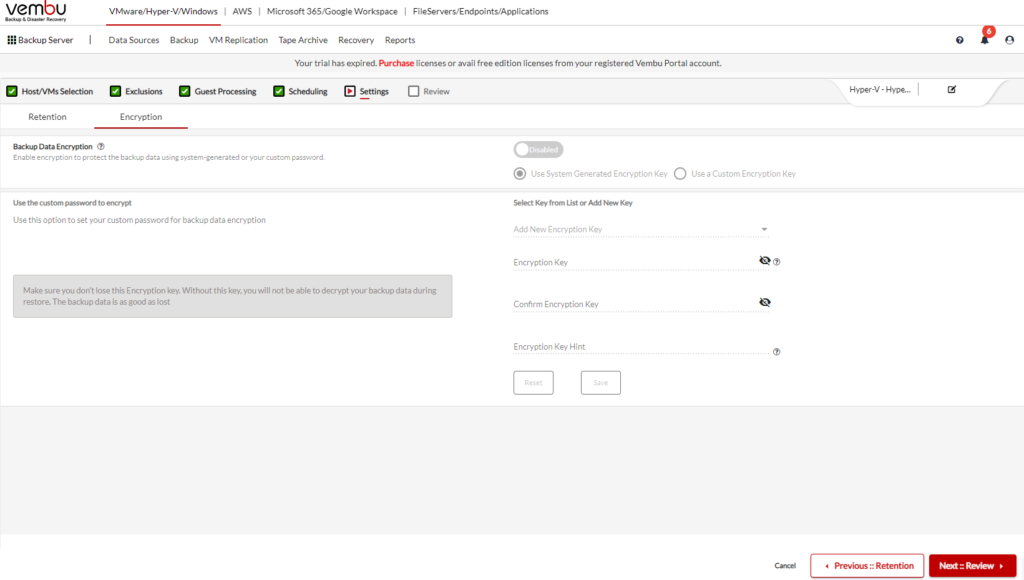
Finally, choose if you want Encryption and if so provide a key.
Lastly, review your new backup job and click SAVE.
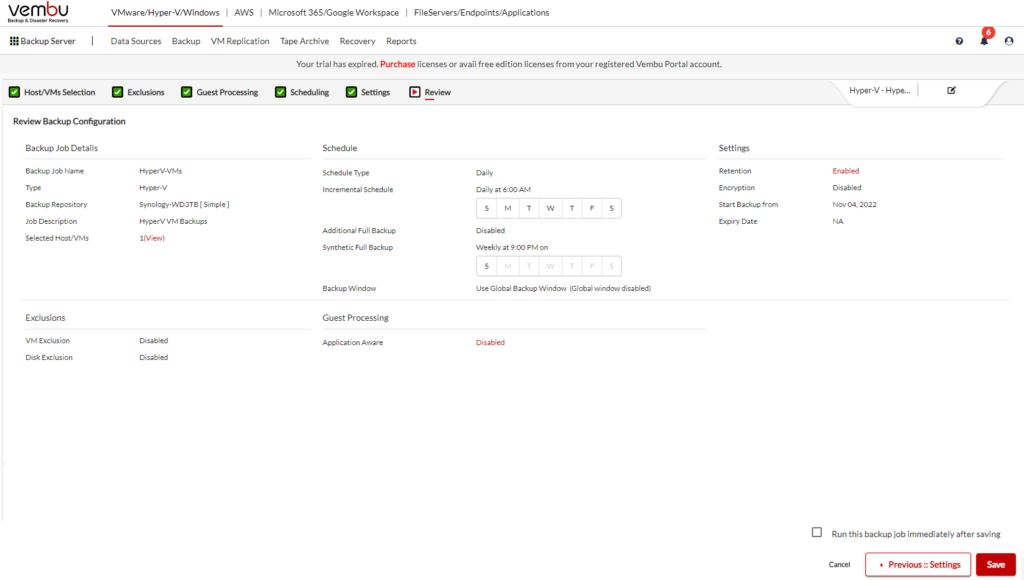
As I didn’t click the run this job immediately checkbox, I decided to run the job manually.
I choose INCREMENTAL as I didn’t want multiple full backups.

The job is now in progress.

You can see, my backup job completed successfully!
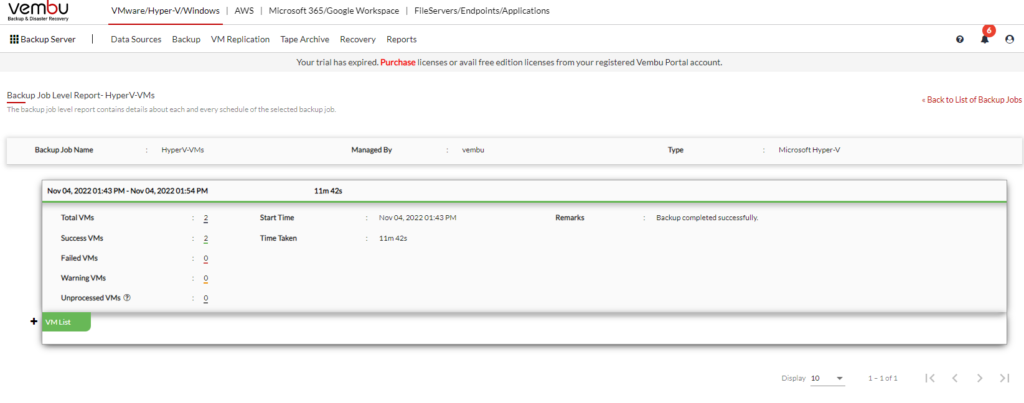
This is how you backup your Hyper-V VMs!
Coming soon, I’ll setup a job to backup these VMs to the cloud!
You can download VEMBU here!
- Want to get more information on Vembu & Hyper-V? Check out the product page here!
Vembu Backup & Replication for Hyper-V - Part 1 – Deploying Vembu BDR Suite (System Requirements)
https://www.thelowercasew.com/deploying-vembu-bdr-suite - Part 2 – Deploying Vembu BDR Suite (Installation)
https://www.thelowercasew.com/deploying-vembu-bdr-suite-part-2-installation - Upgrading Vembu BDR Suite to version 5.2.0
https://www.thelowercasew.com/new-vembu-bdr-suite-release-version-5-2-0 - Part 3 – Deploying Vembu BDR Suite (Configuration)
https://www.thelowercasew.com/deploying-vembu-bdr-suite-part-3-configuration - Part 4 – Deploying Vembu BDR Suite (Replication)
https://www.thelowercasew.com/deploying-vembu-bdr-suite-part-4-replication - New Vembu BDR Suite v5.3
https://www.thelowercasew.com/new-vembu-bdr-suite-v5-3 - Vembu BDR Suite v5.3 – Endpoint Backups
https://www.thelowercasew.com/vembu-bdr-suite-5-3-endpoint-backups - Vembu BDR Suite 5.3 – Microsoft 365 Backup
https://www.thelowercasew.com/vembu-bdr-suite-5-3-microsoft-365-backup - Vembu – How to Setup Immutable Backups to AWS S3
https://www.thelowercasew.com/vembu-how-to-setup-immutable-backups-to-aws-s3
Ben Liebowitz, VCP, vExpert
NJ VMUG Leader

