
Synology: The Power of Active Backup for Business!
Ben Liebowitz
- 1
- 1206
A huge selling point for Synology storage is Active Backup for Business. This FREE backup & recovery tool is very versatile! And did you see that I said it was FREE?! Lets install it on my new DS923+ and point it at my homelab!
If you’re interested in learning more about Synology solutions, check out the link below:
https://sy.to/xtntr
Login to the web interface for your Synology and open the PACKAGE CENTER.
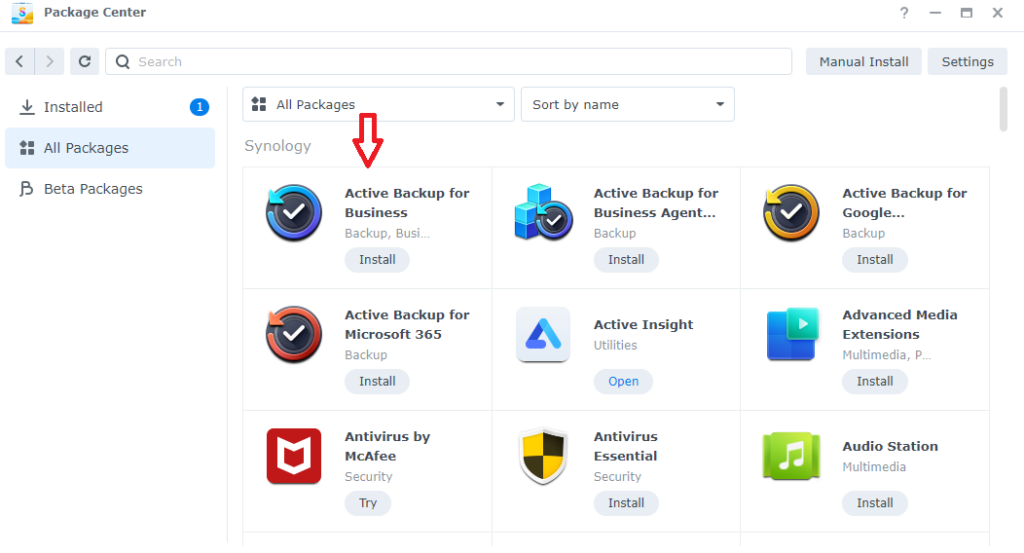
Under ALL PACAKGES, you’ll see ACTIVE BACKUP for BUSINESS. Click INSTALL.
Next, select the volume on the NAS where you want Active Backup to be installed. Since I created 2 volumes, I’m going to choose Volume 2. Click NEXT.

Check the options and click DONE.

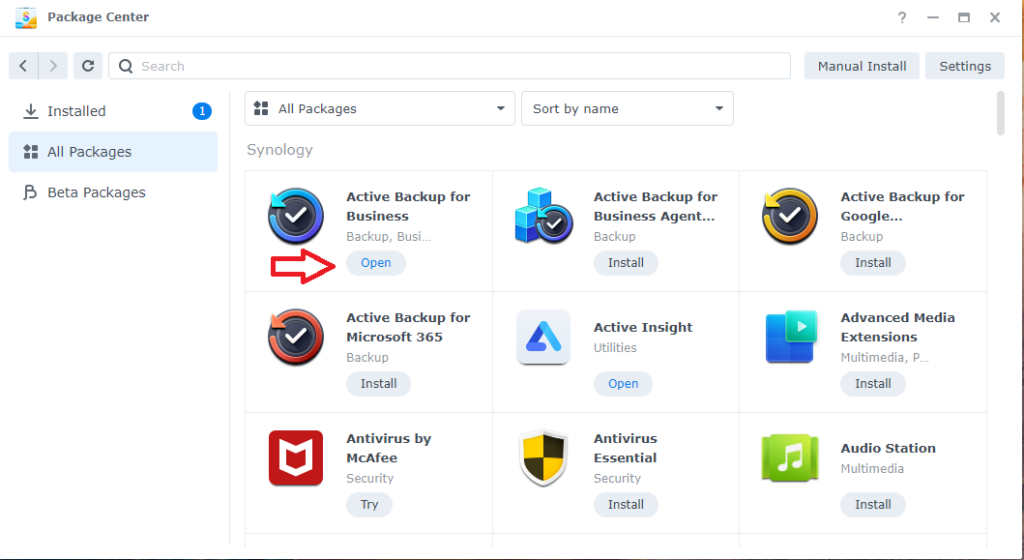
Active Backup for Business will install. When done, click OPEN.
The first time you launch it, you’ll need to ACTIVATE it. Click ACTIVATE.

Agree to the privacy statement and click NEXT.

Now that activation is complete, we click OK to launch Active Backup for Business.

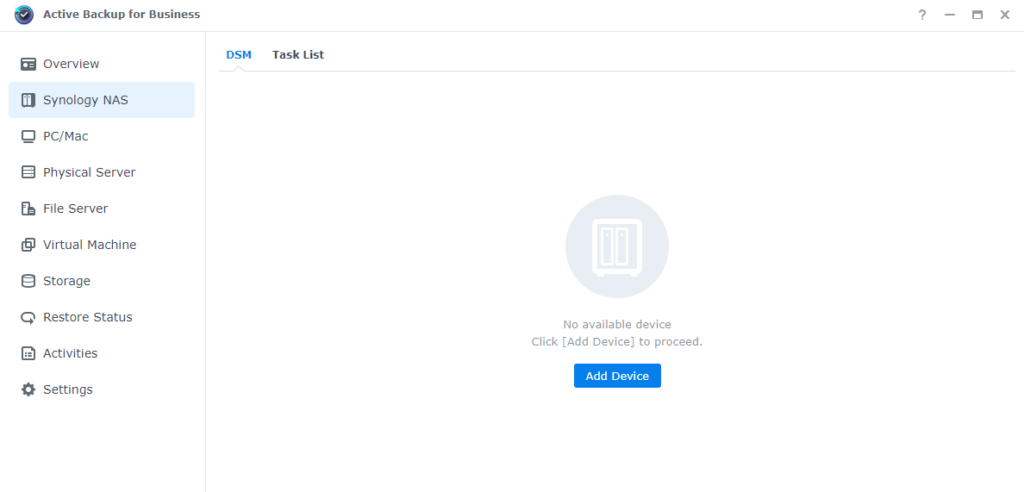
First, I’m going to go to the Synology NAS tab and click ADD DEVICE.
Read about the Active Backup for Business Certificate and click OK.

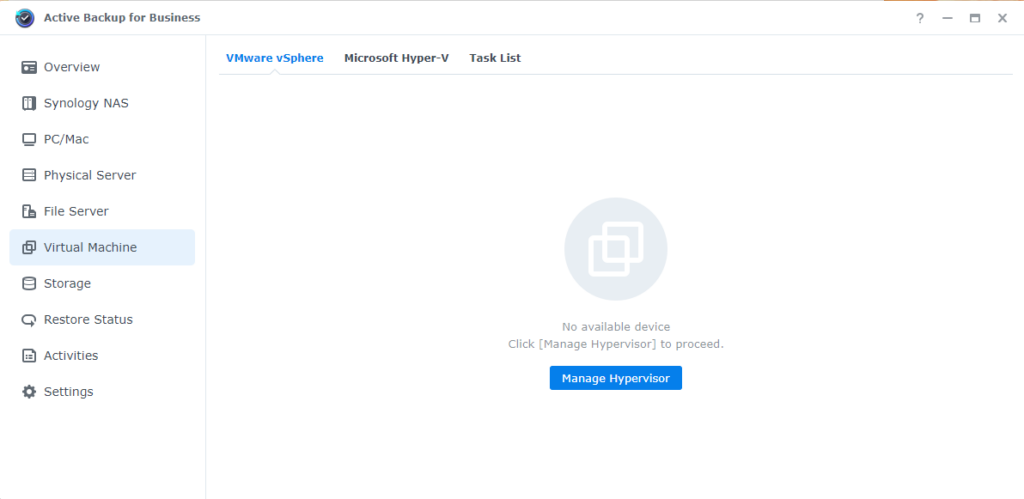
Click VIRTUAL MACHINE and under the VMware vSphere tab, click MANAGE HYPERVISOR.
No hypervisors have been added yet, so click ADD.

Enter the info for your vCenter or ESXi host and click NEXT.

Choose if you trust the certificate or not. I clicked YES.

Verify everything was successful and click DONE.

Now you can see the vCenter listed under Hypervisors. Click CLOSE.

Active Backup will now index your VMs and you can create a task to back them up. Click CREATE TASK.
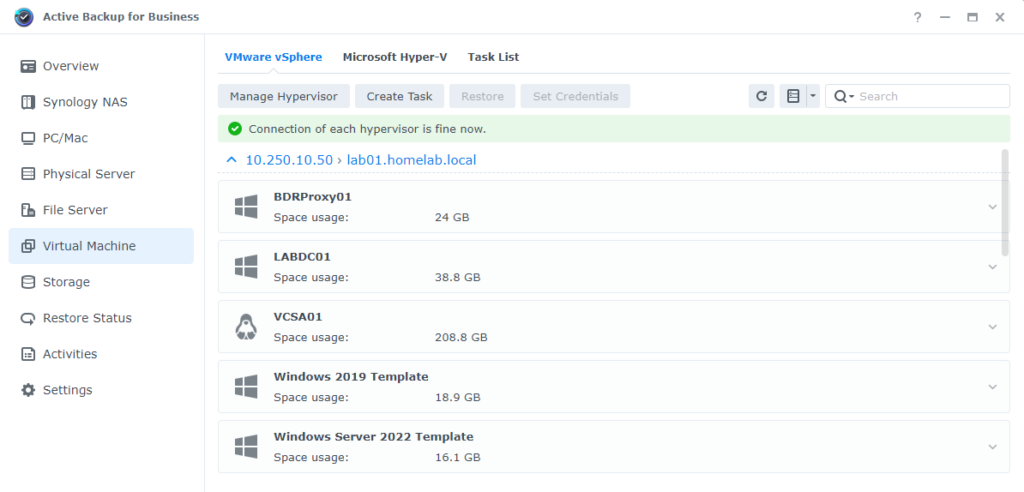
I named the job Infrastructure VMs and I changed the View Mode to VMs and Folders. You can expand the arrow next to your vCenter for a list of folders…

You can see, I selected my Infrastructure folder. Click NEXT.
Next it’ll target the destination volume. Click NEXT.

On the next screen you can enable compression and encryption. I’m enabling compression. Click NEXT.

You’ll want to make sure CBT is enabled (AND that it’s enabled for each of your VMs too!) Select any other settings you want to enable and click NEXT.

Next, it will check the VMs you selected and show which it thinks it can backup and which it cannot. Click NEXT.

Under scheduling, I set it to run daily at 1pm. Click NEXT.

Here, I changed the retention from the default to 3 versions. Click NEXT.

Choose the user that has rights to restore and click NEXT.

Verify your choices and click DONE.

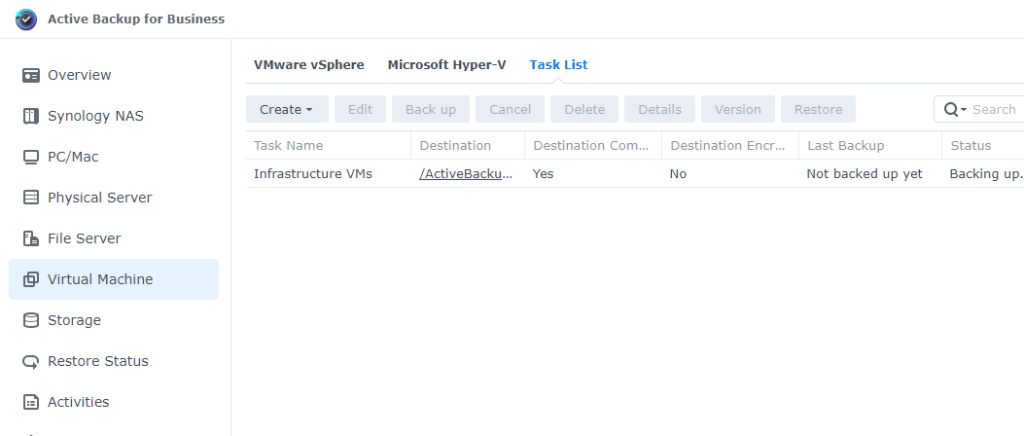
You can choose to backup now or run as scheduled.

You can see that the backup is running.
If you’re interested in learning more about Synology solutions, check out the link below:
https://sy.to/xtntr
Thanks!
Ben Liebowitz, VCP, vExpert
NJ VMUG Leader
One thought on “Synology: The Power of Active Backup for Business!”
Leave a Reply Cancel reply
This site uses Akismet to reduce spam. Learn how your comment data is processed.


Love Active Backup for Business! I use it to backup not only my ESXi host but also several Windows desktops in the house. Fantastic product.