VMworld 2016 Scheduling Tip
Ben Liebowitz
- 0
- 812
Are you going to VMworld 2016 US in Las Vegas? I am! And one thing that annoys me is that you cannot manually add anything to the schedule builder. Also, this year they removed the old schedule builder and integrated it into the Content Catalog, removing some features the old Schedule Builder had, like exporting to PDF, etc.
A fellow VMUG Leader, Eric Lee from the KC VMUG, gave me the idea to export the Schedule from the Content Catalog as an .ICS file and then import that file into Microsoft Outlook, creating a new Calendar. From there, I was able to add the things into the calendar that I wanted, and exported it to PDF!
Here’s how:
1. Log into the VMworld Content Catalog.
https://www.vmworld.com/en/us/learning/content-catalog.html
3. From there, you can click EXPORT

4. I choose .ics, but choose the format you wish to export to. Save the file locally on your computer.

5. In Microsoft Outlook, click FILE – OPEN & EXPORT, and then OPEN CALENDAR.

6. Browse to the location of the file you exported in step 4. Select it and click OPEN

7. The calendar will import into Outlook as UNTITLED. Right click and go to PROPERTIES.

8. From here you can click the top line and rename the calendar and click OK.

9. Now, you can feel free to add whatever events you want to the calendar, like I added Opening Acts, the VMworld Welcome Reception, the VMUG Member Party, vExpert Reception, my VMUG Lounge shift, etc.

10. Now, you can print to XPS or PDF. If you don’t have a PRINT TO PDF reader installed, doPDF is a good one and it’s free.
http://dopdf-free-pdf-converter.soft112.com/quick-download.html

HINT: If you’re traveling from another time zone, temporarily change your time zone in Windows to Pacific Time before you add items to the calendar and save to PDF/Print. This way, the times in your document match the times local to the event. 🙂
PS.
You can do the same with the Google Calendar.
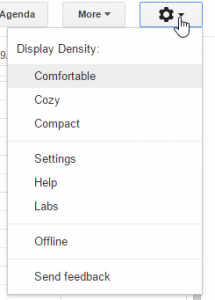
1. In the Google Calendar, click the Gear icon and go to SETTINGS.
2. Click the Calendars tab.
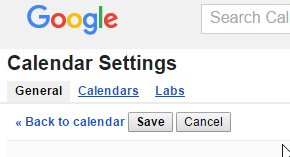
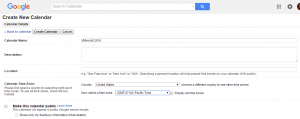
3. Click CREATE NEW CALENDAR.

4. Name it VMworld 2016 (or whatever you’d like). You can also designate what time zone this calendar should be for, which is nice!
5. Go back to SETTINGS and the Calendar tab again.
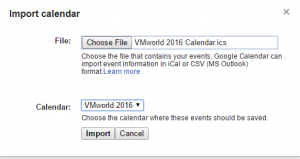
6. Click IMPORT CALENDAR.

7. Browse to the ICS file, select the New calendar to import to. Click IMPORT
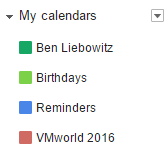
8. You should now see the VMworld 2016 calendar in your MY CALENDARS list.
Hope you find this helpful, like I did.
Ben Liebowitz, VCP, vExpert
NJ VMUG Leader
